
How to Start a Home Herbal Apothecary
How to Start Your Own Home Herbal Apothecary
There’s something incredibly comforting about reaching into your own collection of herbs when you need a soothing tea, calming salve, or simple natural remedy. If you’ve been wondering how to start a home herbal apothecary, you may be surprised by how easy and affordable it can be to begin.
You don’t need shelves overflowing with mysterious jars or an extensive knowledge of herbalism. With a handful of versatile herbs, a few basic supplies, and a little guidance, you can create a practical herbal apothecary that supports your family’s everyday wellness needs.
If you’re just getting into the world of herbalism and looking for an easy way to learn everything you need to know, I highly recommend using Herbal Academy to learn how to put together an herbal medicine cabinet. These courses are online, self-paced, and packed with recipes, tutorials, and more.
When you’re ready to start building your own home herbal apothecary, I’ll walk you through the process step by step, from choosing beginner-friendly herbs to storing them safely and turning them into useful homemade preparations. Whether you want to live more sustainably, rely less on store-bought products, or simply reconnect with traditional plant-based remedies, this guide will help you get started with confidence.
What Is a Home Herbal Apothecary?

A home herbal apothecary is a personal collection of herbs and supplies that you can use to make simple herbal preparations. Depending on your needs and interests, it might include dried herbs for tea, infused oils for skin care, soothing salves, tinctures, poultices, or other traditional remedies.
Despite its name, an herbal apothecary doesn’t need to take up an entire room. Yours could be as simple as one kitchen cabinet containing a few jars of dried herbs, a tea strainer, and basic preparation tools. You can always expand your collection as you learn more about herbalism and discover which herbs you use most often.
Creating a home herbal apothecary is also about developing a closer relationship with plants. Instead of purchasing a different product for every minor need, you’ll learn how a few versatile herbs can be prepared in several ways. Calendula, for example, can be brewed as tea, infused into oil, or added to a homemade salve.
However, it’s important to remember that an herbal apothecary isn’t intended to replace professional medical care or prescription medications. Herbs contain active compounds, and natural doesn’t automatically mean safe for everyone.
Think of your apothecary as a collection of carefully chosen tools for supporting everyday wellness. With reliable information, proper storage, and a willingness to start slowly, it can become a practical and rewarding part of your sustainable lifestyle.
Why Start Your Own Herbal Apothecary?

Starting a home herbal apothecary gives you a simple way to become more involved in the products you use for everyday wellness and personal care. Instead of always purchasing premade teas, balms, and other herbal products, you can learn how to make some of them yourself with ingredients you recognize.
A home apothecary can also support a more sustainable lifestyle. Buying frequently used herbs in larger quantities may reduce packaging, especially when you choose suppliers that use recyclable or compostable materials.
Reusing glass jars for storage and growing some of your own herbs can reduce waste even further. Making only the amount you need may also help prevent half-used products from accumulating in your cabinets.
Another benefit is the opportunity to customize your preparations. You can keep recipes simple, avoid fragrances or other ingredients that bother you, and select herbs that fit your household’s needs. As someone who prefers gentle, practical options, I appreciate knowing exactly what went into a homemade preparation.
Perhaps most importantly, building an herbal apothecary encourages you to slow down and learn. Preparing a cup of herbal tea or infusing oil requires patience and attention, turning an everyday task into a meaningful ritual.
You don’t need to replace everything in your medicine cabinet or make dozens of remedies at once. Begin with one or two useful herbs, learn how to handle them safely, and expand your collection only when it makes sense for you.
Choose a Safe and Convenient Apothecary Space
Before buying herbs and supplies, decide where your home herbal apothecary will be located. The best space is cool, dry, and protected from direct sunlight. Heat, light, air, and moisture can shorten the useful life of dried herbs, oils, and homemade preparations, so avoid storing them above the stove, beside a sunny window, or in a humid bathroom.
Convenience is also important. If your herbs are tucked into a hard-to-reach corner, you may forget to use them. A kitchen cabinet, pantry shelf, hutch, or small bookcase can work well, provided the area has suitable conditions. Choose enough room to organize your current supplies without encouraging yourself to purchase more than you can realistically use.
If children or pets live in your home, select a secure location they cannot access. This is especially important for tinctures, essential oils, concentrated preparations, and any herb that could be harmful when used incorrectly. A high cabinet or locking storage box may be appropriate, depending on what you plan to keep.
Clean and dry the area before setting up your supplies. Check occasionally for moisture, insects, leaking containers, or expired ingredients. Keep herbs away from household cleaners and other substances that could contaminate them.
Your apothecary doesn’t have to look like a picture-perfect collection of matching jars. A safe, organized, and easy-to-use space is far more valuable than an elaborate display.
Essential Supplies for a Home Herbal Apothecary

You only need a few basic supplies to begin making simple herbal preparations. Before buying anything new, check your kitchen for tools you can repurpose. This keeps your initial costs down and makes your apothecary more sustainable.
Glass jars with tight-fitting lids are useful for storing dried herbs and making infused oils or tinctures. Choose containers that are completely clean and dry, and use dark glass bottles for preparations that need additional protection from light. Smaller jars are often better for beginners because they leave less room for air and discourage you from making more than you can use.
Measuring spoons, measuring cups, a kitchen scale, a funnel, and a fine-mesh strainer or reusable tea infuser will help you measure and prepare herbs. Cheesecloth can be useful for straining fine plant material.
You may also want a small saucepan, mixing bowl, mortar and pestle, and labels with a waterproof pen. If possible, reserve certain tools for herbal projects, especially when working with strongly colored or aromatic ingredients.
A notebook or binder is another valuable addition. Record each ingredient, measurement, preparation date, method, and storage recommendation. You can also note how the finished product looks and smells so changes are easier to recognize.
You don’t need an expensive starter kit. Begin with the supplies required for one simple recipe, then add tools gradually as your skills and interests grow.
The Best Herbs for a Beginner Herbal Apothecary
When choosing your first herbs, look for gentle, versatile options that can be used in several simple preparations. Starting with three to five herbs gives you time to learn about each one before filling your shelves with ingredients you may never use.
Chamomile is a familiar choice for caffeine-free tea and is often included in calming bedtime blends. Calendula flowers are popular in infused oils, balms, and salves intended for external use. Peppermint makes a refreshing tea, while ginger can be used in warming drinks and recipes. Lemon balm is another beginner-friendly tea herb with a pleasant lemony flavor.
Related: Incredibly Powerful Medicinal Herbs You Should Be Growing in Your Garden
Lavender is commonly added to sachets, bath preparations, and skin care products, although its aroma can be strong for anyone who is fragrance-sensitive. If you prefer unscented or lightly scented products, begin with a small amount or choose a different herb.
Whenever possible, purchase one herb at a time rather than beginning with premade blends. This helps you become familiar with its appearance, aroma, flavor, and typical uses. Research its precautions through trustworthy herbal and medical resources before using it.
Even widely available herbs are not appropriate for everyone. Allergies, pregnancy, health conditions, medications, age, and preparation method can all affect safety. Check with a qualified healthcare professional before using an unfamiliar herb, especially if you take medication or plan to give it to a child.
How to Grow Your Own Medicinal Herbs
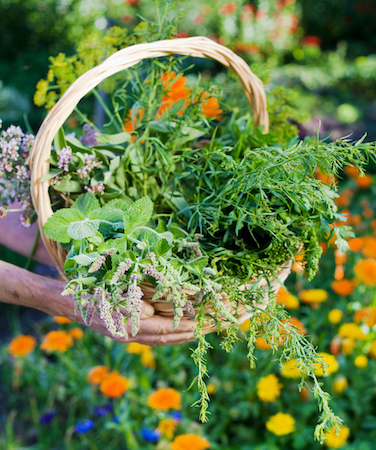
Growing some of your own medicinal herbs can make your home apothecary more affordable and sustainable. You’ll know exactly how the plants were grown, and you can harvest only what you need.
You don’t need a large garden, either. Many useful herbs grow well in pots on a balcony, patio, or even in a sunny windowsill indoors.
Begin with one or two plants suited to your climate and growing conditions. Calendula, peppermint, lemon balm, chamomile, lavender, and thyme are popular choices, but each has different requirements.
Before planting, check how much sunlight, water, and space an herb needs. Peppermint and lemon balm can spread quickly, so I prefer growing them in containers where they’re easier to control.
Purchase seeds or plants from a reputable nursery and confirm the botanical name on the label. Common names can refer to more than one plant, and not every variety has the same traditional uses.
Avoid applying synthetic pesticides or other chemicals that aren’t intended for plants you plan to consume or use in herbal preparations.
As your herbs grow, watch for signs of pests, disease, or contamination. Keep pets away from the plants, and don’t harvest anything that has been exposed to lawn treatments, roadside pollution, or questionable water.
Start with herbs you already enjoy and will realistically use. A few healthy, well-cared-for plants are much more valuable than a crowded garden of unfamiliar varieties.
Where to Buy High-Quality Herbs

If you can’t grow everything yourself, purchasing dried herbs is a convenient way to stock your home apothecary. However, quality can vary considerably, so it’s important to choose your supplier carefully.
Look for a well-established herb company that clearly identifies each plant by its common and botanical names. The listing should also specify which plant part is included, such as the leaf, flower, root, or seed. When available, check the herb’s country of origin, harvest date, organic certification, and information about the company’s testing and sourcing practices.
High-quality dried herbs should generally retain a recognizable color and aroma. They shouldn’t look unusually faded, smell musty, or contain visible moisture, mold, insects, or large amounts of unrelated plant material. Keep in mind that appearance naturally varies among herbs, so learn what each ingredient should look and smell like before using it.
It may be tempting to purchase a large quantity to save money, but herbs can lose quality over time. I recommend ordering a small amount first so you can evaluate the supplier and make sure you’ll actually use the herb.
Avoid gathering medicinal herbs from roadsides, public parks, or unfamiliar properties. The plants may have been exposed to pesticides or pollution, and misidentification can be dangerous.
Whether you buy herbs locally or online, careful sourcing helps ensure you know what you’re bringing into your apothecary.
How to Harvest and Dry Fresh Herbs
The best harvesting method depends on the plant and the part you intend to use. Leaves are often gathered before the plant produces flowers, while flowers are typically collected soon after they open. Choose healthy, undamaged plant material and harvest on a dry day after the morning dew has evaporated. Always confirm the plant’s identity before cutting it.
Use clean scissors or pruning shears and avoid removing more than the plant can handle. If you’re gathering flowers, leave plenty behind for pollinators and seed production. Place each type of herb in a separate, labeled container so nothing becomes mixed up.
If necessary, gently rinse cultivated herbs and remove excess water. They must be thoroughly dry before the drying process begins.
You can hang small bundles upside down or arrange leaves in a single layer on a drying screen. Keep them in a dark, dry, well-ventilated space. A food dehydrator can also be used at the appropriate setting for herbs.
Drying times vary based on the plant, humidity, and method. Many air-dried herbs take approximately one to two weeks. Leaves should feel crisp and crumble easily when fully dry. If they bend or feel soft, they may still contain moisture.
Once dry, remove unwanted stems and transfer the herbs to labeled, airtight containers. Proper drying is important because lingering moisture can encourage mold and spoil your entire batch.
How to Store Herbs to Keep Them Fresh
Proper storage helps protect the color, aroma, and overall quality of your dried herbs. Place each herb in a clean, completely dry, airtight container. Glass jars work well because they’re reusable and make it easy to check the contents for moisture, insects, or other signs of deterioration.
Keep the containers in a cool, dry, dark location away from the stove, sink, dishwasher, and sunny windows. Heat, light, air, and humidity can cause herbs to lose quality more quickly.
A closed pantry or kitchen cabinet is usually a better choice than an open shelf, even if rows of colorful jars look attractive on display.
Related: Easy Ways to Store Naturally Store Your Garden Harvest
Label every container with the common name, botanical name, plant part, supplier or harvest location, and the date it was purchased or dried. I also find it helpful to record the lot number from purchased herbs in case the supplier announces a recall.
Store leaves and flowers whole when possible, then crush or grind them shortly before use. Smaller pieces have more surface area exposed to air and may lose their aroma faster.
Inspect your collection regularly. Discard herbs if you notice mold, moisture, insects, an unusual odor, or another sign of contamination.
Properly dried herbs may retain quality for around a year, but this varies by herb and storage conditions. Instead of relying only on a date, check each herb’s appearance and aroma before using it.
Simple Herbal Preparations You Can Make at Home

Once you’ve chosen a few herbs, you can begin experimenting with simple preparations. Herbal tea is often the easiest place to start.
An infusion is generally made by steeping delicate plant parts, such as leaves and flowers, in hot water. Tougher materials, including some roots, seeds, and bark, may require a decoction, which involves gently simmering them in water.
You can also make an herbal compress by soaking a clean cloth in a prepared infusion and applying it externally as directed by a reliable recipe. A poultice uses moistened plant material on the skin, while an herbal bath or foot soak disperses a suitable preparation in water.
Oil infusions are made by steeping properly dried herbs in a carrier oil. The strained oil can then be used on its own or included in a salve with wax. Since introducing water or fresh plant material can increase spoilage risks, beginners should follow a tested, reputable recipe instead of estimating measurements or substituting ingredients.
Tinctures, syrups, and other concentrated or water-containing preparations require additional knowledge about ratios, sanitation, storage, dosing, and shelf life. I recommend learning the fundamentals before adding these to your apothecary.
Begin with one preparation at a time, make a small batch, and label it carefully. Record the ingredients, measurements, method, and date in your herbal journal. This makes it easier to repeat successful recipes and identify anything you would change next time.
Important Herbal Safety Tips for Beginners

Herbs may be natural, but that doesn’t mean every herb or preparation is safe for every person. Plants contain active compounds, and the risks can change depending on the species, plant part, amount, preparation method, and how it is used. Research each herb through reliable medical and botanical sources before adding it to your apothecary.
Always verify the botanical name and the correct plant part. Never taste or use a wild plant unless its identity has been confirmed by a qualified expert. Follow a trusted recipe, measure carefully, and avoid assuming that a stronger preparation will produce better results.
Herbs and supplements can interact with prescription medications, over-the-counter medicines, and other supplements. Some may also be unsuitable before surgery or for people with certain medical conditions.
Pregnant or breastfeeding individuals, children, older adults, and anyone taking medication should consult a qualified healthcare professional before using herbal products.
Test topical preparations on a small area first, and stop using anything that causes irritation or another unexpected reaction. Clearly label every preparation and keep herbs, tinctures, essential oils, and homemade remedies away from children and pets.
Finally, don’t use herbal preparations as a substitute for necessary medical care. Seek professional help for severe, persistent, or worsening symptoms, allergic reactions, poisoning concerns, or any situation that may be an emergency.
Start Small and Grow Your Apothecary Over Time
Learning how to start a home herbal apothecary doesn’t mean you need to purchase dozens of herbs or master every type of herbal preparation at once. In fact, starting small gives you the opportunity to become familiar with each herb, learn how your body responds, and discover which preparations are genuinely useful in your home.
Choose three to five versatile herbs and begin with something simple, such as an herbal tea, compress, or infused oil made from a trusted recipe. Keep careful notes about what you purchase or grow, how you prepare it, and when it needs to be replaced. As your knowledge and confidence grow, you can gradually add new herbs, supplies, and skills.
Your apothecary should reflect your household’s needs rather than an idealized collection you’ve seen online. By making thoughtful choices, reusing containers, growing what you can, and purchasing only what you’ll use, you can create a practical resource that complements your sustainable lifestyle.
Most importantly, stay curious and continue learning from reliable sources. A home herbal apothecary is something you build slowly and intentionally. With patience, proper safety precautions, and respect for the plants you’re using, your small collection can grow into a meaningful part of your everyday wellness routine.


