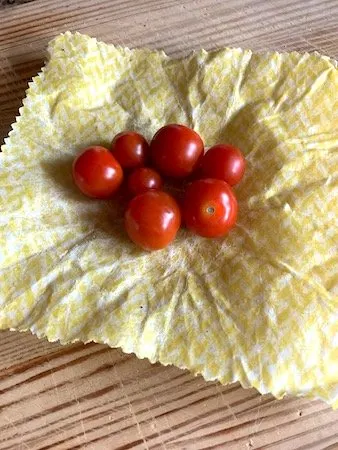
Simple Steps for How to Make Beeswax Wraps
Whether you’re trying to pack a zero waste lunch, want to create a zero waste kitchen, or you’re simply trying to reduce your plastic use, making the switch to beeswax wraps is a fantastic option. Even better, it’s incredibly easy to create your own when you follow these simple steps for how to make beeswax wraps.
Related: 50+ Awesome Alternatives to Plastic
What Are Beeswax Food Wraps?

Beeswax wraps are a great solution to reducing waste. Most beeswax food wraps are made using cotton fabric, beeswax, pine resin, and jojoba oil. Check out this informative post if you’re interested in learning more about beeswax wraps and how you can use them to replace plastic wrap.
Once the wraps start to lose their stickiness, you can either reapply the ingredients or compost them. This makes them perfect for anyone trying to live a low waste or zero waste life.
Related: The Best Zero Waste Products for Beginners
If you don’t have time for DIY, you can either check out this list of the best beeswax wraps or take a look at these great options:
- Etee Reusable Beeswax Food Wraps
- Etee Vegan Food Wraps
- Life Without Plastic Beeswax Wrap Set
- Organic Cotton Beeswax Wrap Set
All of these sets contain three different sizes, so you’re sure to always have the size you need. They’re also made with ethically sourced ingredients, so you know you’re getting a quality product that’s sustainable.
Even better, all of the options come from some of the best zero waste online shops. This means you can be sure you’re getting a product that’s good for you and good for the environment.
Also, whether you make or buy your wraps, don’t forget to check out this helpful post on how to care for beeswax wraps so you can make them last as long as possible.
DIY Beeswax Wraps Ingredients
When you’re ready to make your own beeswax wraps, you’ll need to gather the following ingredients:
- 100% organic cotton fabric
- 2.5 tablespoons of beeswax pellets
- 2 teaspoons of pine resin
- 1 tablespoon of jojoba oil
- Pinking shears
- Double boiler pot
- Silicone brush
- Compostable parchment paper
- Baking sheet
- Coat hanger and clothespins for drying
Homemade Beeswax Wraps Instructions

- Wash and dry your organic cotton fabric. (Check out this post to learn why I only recommend using organic cotton.)
- Cut the fabric into the desired shapes and sizes you need. I’ve found that 8 x 8 inches, 11 x 11 inches, and 14 x 14 inches are convenient sizes to use.
- To prevent fraying, use the pinking shears to trim the edges.
- Preheat the oven to 200° F.
- Add the beeswax pellets, pine resin, and jojoba oil into the double boiler.
- Add water to the saucepan, place the double boiler over the saucepan, turn the burner to medium-high heat, and allow the ingredients to melt. It should take about 20 minutes.
- While the ingredients are melting, place parchment paper on a large baking sheet. Put your fabric piece or pieces on the parchment paper.
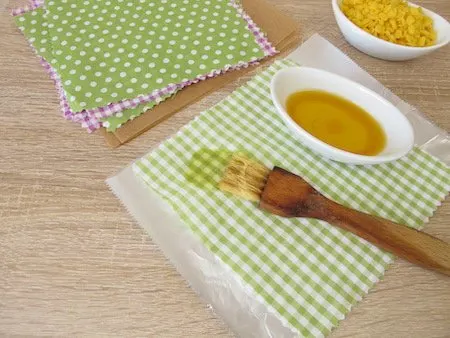
- Once the ingredients have melted, use the silicone brush to lightly brush the mixture on the fabric. Do this carefully because it’s easy to over-saturate. Remember, you can always add more, but you can’t take excess away.
- Place the baking sheet in the oven for 2 minutes.
- Remove the baking sheet from the oven and look for dry spots or unevenness. If you notice any, brush the mixture over these spots and place the baking sheet back in the oven for 2 minutes.
- When your wraps look good, remove them from the parchment paper and use the clothespins to hang them on coat hangers to dry. This will only take a few minutes.
- These measurements should cover two 11 x 11-inch cloths.
A Few Notes About How to Make Beeswax Wraps
Many DIY beeswax wrap recipes call for just beeswax. While this is adequate, beeswax alone tends to leave the cotton very stiff and without any of the stickiness you need to really conform and adhere to different shapes and foods.
Pine resin helps give the wrap the stickiness you need. Plus, jojoba oil and beeswax both have natural antibacterial properties that help keep food fresh. This is why I recommend using all three ingredients.
Beeswax and pine resin are both insanely sticky and nearly impossible to clean up. I highly recommend getting bowls, brushes, spoons, and a double boiler that are dedicated just for making your beeswax wraps.
It’s very easy to over-saturate the fabric. Begin with a light coat of beeswax mixture and apply more as needed. If you accidentally put on too much, lay another piece of fabric on top to absorb the excess.
I found that these measurements added just the right amount of stickiness to my wraps. If you prefer more stickiness, simply add some more pine resin to the recipe. For less stickiness, reduce the amount of pine resin you use.
Your beeswax wrap will eventually lose its stickiness. When you need to refresh it, place parchment paper on a baking sheet and put it in a 200° F oven for a few minutes. When you take it out, use your silicone brush to spread the warm mixture evenly over the fabric.
How to Make Beeswax Wraps for Zero Waste Living
Beeswax food wraps are an essential part of any zero waste kitchen. Thanks to these simple steps, you know how to make beeswax wraps on your own. You can now use your wraps on leftovers, to cover bowls, when you’re packing a lunch, and more.
More Tips for an Eco-Friendly Kitchen
Now that you see how easy it is to make beeswax wraps, are you ready for even more great tips for an eco-friendly kitchen? Then be sure to check out some of our other popular posts:
- Easy Ways to Reduce Paper Towel Use
- Homemade Granite Countertop Cleaner
- Best Non-Toxic and Plastic Free Sippy Cups
- Over 100 Outstanding Vegetarian Recipes


Alexandra
Tuesday 5th of January 2021
What’s the proper way to store them?
Kristen
Tuesday 5th of January 2021
You have a variety of options for storing your wraps. I fold mine and keep them in a drawer with my silicone bags. You can also roll them up and store them in a cabinet or place them in a basket on your counter. I do have one word of caution. One time I placed them in a drawer next to my stove. While the wax didn't melt, it did get pretty sticky! So you might want to keep them away from high sources of heat.