
Easy First Canning Recipes for Beginner Homesteaders
New to Canning? Start With These Easy Recipes!
Have you ever looked at a pantry filled with beautiful jars of homemade jams, pickles, and preserved fruits and thought, “I wish I knew how to do that!”? Well, these easy first canning recipes are the perfect place to start, even if you’ve never canned a single thing in your life!
There’s something incredibly satisfying about turning fresh, seasonal produce into delicious homemade preserves you can enjoy long after the growing season ends. Not only is canning a wonderful way to reduce food waste and make the most of your garden harvest or farmers market finds, but it can also help you save money and become a little more self-sufficient.
I know canning can seem intimidating at first. Between sterilizing jars, figuring out processing times, and making sure everything is safe to eat, it’s easy to feel overwhelmed before you even get started.
But here’s the good news: You don’t need a pantry full of expensive equipment or years of experience to start canning! In fact, some of the easiest recipes are also the most delicious.
In this guide, I’ll share some of the best canning recipes for beginners, along with helpful tips to make your first canning experience easier, safer, and more enjoyable. We’ll focus on simple, tested recipes that are suitable for water bath canning, so you can build your confidence without investing in a pressure canner.
If you’re ready to turn fresh produce into jars of homemade goodness, keep reading to discover everything you need to know.
Water Bath Canning vs. Pressure Canning: What’s the Difference?

If you’re new to canning, one of the first things you’ll need to understand is the difference between water bath canning and pressure canning. While both methods preserve food for long-term storage, they work differently and aren’t interchangeable.
Water bath canning is the easiest method for beginners. It involves placing filled jars in a large pot of boiling water for a specific amount of time. This method is safe for high-acid foods, such as most fruits, jams, jellies, and properly pickled vegetables. The acidity helps prevent the growth of harmful bacteria, including those that cause botulism.
Pressure canning, on the other hand, is necessary for low-acid foods, such as plain vegetables, meats, poultry, and beans. A pressure canner reaches temperatures higher than boiling water, which are necessary to destroy dangerous bacterial spores that can survive ordinary boiling.
So, which method should you start with?
If you’re just learning how to can, I recommend starting with water bath canning. It’s more affordable, requires less specialized equipment, and is perfect for many of the easy first canning recipes I’ve shared above.
Important safety reminder: Always follow a scientifically tested canning recipe and use the recommended processing method, time, and pressure when applicable. Never substitute water bath canning for pressure canning when a recipe requires a pressure canner. Also, remember that an ordinary pressure cooker or electric multicooker isn’t necessarily suitable for pressure canning.
1. Strawberry Jam

If you’re looking for the perfect recipe to start your canning journey, homemade strawberry jam is hard to beat! It’s sweet, delicious, and surprisingly simple to make. Plus, there’s something incredibly satisfying about spreading your own homemade jam on a warm piece of toast.
One of the reasons I love recommending strawberry jam to beginners is that you don’t need a long list of complicated ingredients. Most traditional recipes use fresh strawberries, sugar, lemon juice, and sometimes pectin to help the jam set.
The basic process involves washing and crushing your strawberries, combining them with the other ingredients, and cooking the mixture until it reaches the consistency specified in your recipe. Then, you’ll transfer the hot jam into prepared canning jars and process them in a boiling-water canner.
If you’re growing strawberries in your garden or find a great deal at the farmers market, making jam is also a wonderful way to preserve those berries before they spoil.
For your first batch, I recommend using a tested recipe that includes commercial pectin. These recipes typically have straightforward instructions and a more predictable setting process.
Beginner canning tip: Don’t reduce the sugar or change the amount of lemon juice in a traditional jam recipe unless the tested instructions specifically allow it. These ingredients can affect how your jam sets and, depending on the recipe, its safe preservation.
2. Blueberry Jam
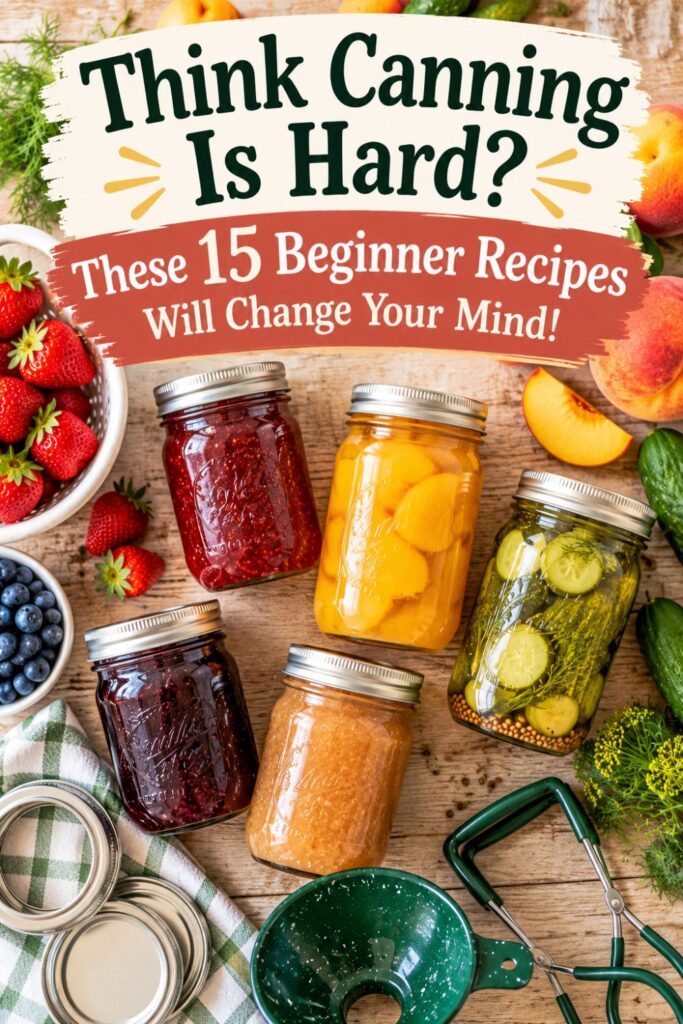
Have more blueberries than you know what to do with? Instead of letting those delicious little berries go to waste, why not turn them into homemade blueberry jam?
Blueberry jam is another fantastic choice for first-time canners because it requires relatively little preparation. Unlike some fruits that need peeling, pitting, or extensive chopping, blueberries generally just need to be washed and sorted before you get started.
Most beginner-friendly blueberry jam recipes use blueberries, sugar, lemon juice, and pectin. You’ll typically crush the berries, combine them with the other ingredients according to your recipe, and cook the mixture until it reaches the proper consistency.
Related: The Best Fruit Trees Every Homesteader Should Be Growing
Once your jam is ready, you’ll ladle it into prepared jars, leaving the headspace specified in your tested recipe. After wiping the rims and securing the lids, you’ll process the jars in a boiling-water canner for the recommended amount of time.
I especially love blueberry jam because it’s so versatile. You can spread it on toast, swirl it into yogurt, spoon it over pancakes, or even use it as a filling for homemade baked goods.
Here’s another bonus: Many tested blueberry jam recipes allow you to use frozen berries, which means you don’t have to wait for blueberry season to try your hand at canning!
Beginner canning tip: If you’re using frozen blueberries, check whether your tested recipe calls for thawing them first. Follow those directions rather than guessing at preparation or cooking times.
3. Peach Jam
There’s nothing quite like biting into a perfectly ripe, juicy peach on a warm summer day. But wouldn’t it be wonderful if you could enjoy that delicious peach flavor long after summer ends?
That’s exactly why homemade peach jam deserves a spot on your list of easy first canning recipes!
Peach jam is a fantastic way to preserve fresh peaches, especially if you have a peach tree or find yourself with more fruit than your family can eat before it spoils.
Most traditional peach jam recipes call for fresh peaches, sugar, lemon juice, and pectin. The biggest part of the preparation is usually peeling, pitting, and chopping the peaches.
If peeling peaches sounds like a hassle, here’s a helpful trick: Briefly blanching ripe peaches in boiling water and then transferring them to ice water can make the skins much easier to remove.
Once your peaches are prepared, you’ll combine the ingredients and cook the jam according to your tested recipe. Then, simply fill your prepared jars and process them in a boiling-water canner for the required time.
The finished jam is delicious on biscuits, toast, and English muffins. You can even spoon it over vanilla ice cream for a simple homemade dessert.
Beginner canning tip: Choose ripe, flavorful peaches that are still in good condition. Avoid bruised or spoiled fruit, and don’t substitute white-fleshed peaches in a recipe developed for yellow peaches unless the tested instructions explicitly permit it.
4. Apple Butter

If you love the warm, comforting flavors of fall, homemade apple butter might become one of your favorite things to can!
Despite its name, apple butter doesn’t contain any actual butter. Instead, it’s a thick, smooth fruit spread made by slowly cooking apples until they develop a rich, concentrated flavor.
Many apple butter recipes include apples, sugar, cinnamon, cloves, and an acidic ingredient such as apple cider vinegar. As the apples cook, they soften and break down into a deliciously fragrant mixture that makes your entire kitchen smell like autumn.
One of the things I love most about apple butter is that it’s a wonderful way to use an abundance of seasonal apples. If you’ve recently visited an apple orchard or stocked up at the farmers market, this recipe can help you preserve some of that harvest.
Depending on your tested recipe, you may be able to prepare the apple mixture using a slow cooker before completing the required cooking and canning steps. Just make sure the recipe specifically provides safe instructions for that method.
Once the apple butter reaches the proper thickness, you’ll fill your prepared jars and process them according to the tested instructions.
Try spreading your homemade apple butter on toast, stirring it into oatmeal, or adding it to baked goods for extra fall flavor.
Beginner canning tip: Apple butter is thicker than applesauce, so don’t assume the two have identical processing instructions. Always follow a tested recipe specifically developed for canning apple butter.
5. Raspberry Jam
If you’re a fan of sweet treats with a little tartness, homemade raspberry jam is another delicious recipe to try when you’re learning how to can.
Raspberries have such a wonderful natural flavor that you don’t need to add a lot of extra ingredients to create something special. Many traditional raspberry jam recipes use raspberries, sugar, and pectin, although the exact ingredients depend on the tested recipe you choose.
One of the biggest advantages of making raspberry jam is that there’s very little fruit preparation involved. You won’t need to peel or pit anything. Simply sort through your raspberries, remove any damaged fruit, and gently wash them before following your recipe’s preparation instructions.
Related: How to Make an Effective Homemade Fruit and Veggie Wash
From there, you’ll crush the berries and cook them with the other ingredients until the jam reaches the proper consistency. Once it’s ready, you’ll fill your jars, adjust the lids, and process them in a boiling-water canner.
Homemade raspberry jam is fantastic on toast, biscuits, and scones. It’s also delicious as a filling for cookies or layered into homemade desserts.
If you’re lucky enough to grow raspberries in your garden, making jam is an excellent way to preserve your harvest and enjoy those berries throughout the year.
Beginner canning tip: If you prefer seedless raspberry jam, look for a tested recipe specifically designed for jelly or strained fruit. Removing seeds or changing the amount of fruit pulp in a regular jam recipe can affect the finished product.
6. Dill Pickles
If you’ve ever enjoyed a crunchy, tangy dill pickle straight from the jar, you might be surprised to learn just how easy it is to make your own!
Homemade dill pickles are one of my favorite canning recipes to recommend to beginners because they’re a fantastic introduction to preserving vegetables. Plus, they’re a great way to use up an abundance of cucumbers from your garden.
Most traditional dill pickle recipes use pickling cucumbers, vinegar, water, canning salt, dill, and sometimes garlic or pickling spices. The vinegar creates the acidic environment needed for safe water bath canning when you follow a tested recipe.
The process is pretty straightforward. You’ll wash your cucumbers, prepare the vinegar brine according to your recipe, and pack the cucumbers into prepared canning jars with the recommended seasonings.
Next, you’ll pour the brine over the cucumbers, leave the specified headspace, and process the jars in a boiling-water canner.
One of the best things about making your own dill pickles is enjoying that fresh cucumber flavor long after gardening season has ended. They’re delicious on sandwiches, alongside homemade burgers, or straight from the jar as a snack!
Beginner canning tip: Choose small, firm pickling cucumbers rather than large slicing cucumbers. Also, never reduce the vinegar or increase the water in a tested pickling recipe, since the proper acidity is essential for safe preservation.
7. Pickled Red Onions
Have you ever added pickled red onions to a sandwich, salad, or taco? If so, you already know how something so simple can add an incredible burst of flavor to a meal!
Pickled red onions are another great option for beginner canners because they require relatively few ingredients and very little preparation.
Most recipes use red onions, vinegar, water, sugar, salt, and sometimes spices. The onions turn a beautiful pink color as they pickle, making them just as pretty as they are delicious.
To get started, you’ll peel your onions and slice them according to your tested recipe. Next, you’ll prepare the vinegar brine, pack the onions into canning jars, and add the hot brine.
After removing air bubbles and adjusting the headspace, you’ll process the jars in a boiling-water canner for the time specified in your recipe.
One thing I especially love about pickled red onions is how versatile they are. You can add them to veggie burgers, grain bowls, salads, sandwiches, and so many other dishes.
They’re also a wonderful way to preserve extra onions before they start to spoil.
Beginner canning tip: Many popular pickled red onion recipes are refrigerator pickles, which aren’t necessarily safe for shelf storage. Make sure you choose a scientifically tested recipe specifically designed for water bath canning. Don’t assume a refrigerator recipe can be made shelf-stable simply by processing the jars.
8. Pickled Carrots
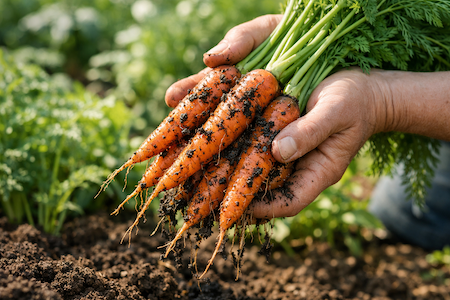
If you’ve never tried pickled carrots before, you’re in for a treat! They have a wonderful combination of sweetness, tanginess, and crunch that makes them a delicious addition to all kinds of meals.
Pickled carrots are also a fun way to preserve extra carrots from your garden or take advantage of a great deal at the farmers market.
Depending on the tested recipe, you’ll typically need fresh carrots, vinegar, water, salt, sugar, and seasonings. Some recipes include spices that give the carrots an extra burst of flavor.
To prepare your carrots, you’ll wash and peel them before cutting them into the shape and size specified in your recipe. Carrot sticks or slices can work well, depending on the instructions.
Next, you’ll prepare the pickling liquid and pack the carrots into your canning jars. Once you’ve added the hot brine, you’ll process the jars in a boiling-water canner for the recommended amount of time.
I love the idea of keeping homemade pickled carrots in the pantry because they’re such a convenient addition to salads, sandwiches, and snack platters.
They also make a thoughtful homemade gift for someone who enjoys tangy, pickled vegetables!
Beginner canning tip: Carrots are naturally low-acid vegetables, so they must be properly acidified for water bath canning. Never use a regular canned carrot recipe in a water bath canner. Plain carrots require pressure canning.
9. Bread and Butter Pickles
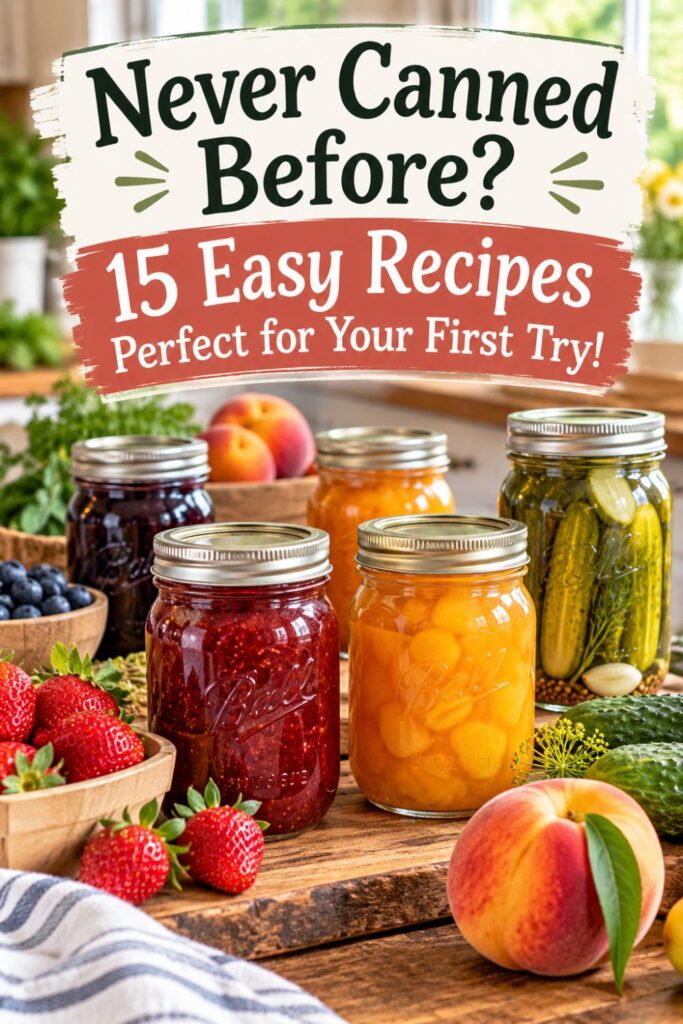
If traditional dill pickles are a little too sour for your taste, homemade bread and butter pickles might be exactly what you’re looking for!
These delicious pickles have a sweet and tangy flavor that makes them especially popular on sandwiches and burgers. They’re also a wonderful way to preserve extra cucumbers during the summer growing season.
Most bread and butter pickle recipes use pickling cucumbers, onions, vinegar, sugar, salt, and spices such as mustard seeds, celery seeds, and turmeric.
Unlike dill pickle spears, bread and butter pickles are typically made with thinly sliced cucumbers. This makes them particularly convenient for adding directly to sandwiches.
To get started, you’ll wash and slice your cucumbers, prepare them as directed in your tested recipe, and combine them with the pickling liquid and spices.
Some recipes require soaking the cucumber slices in salt or ice before canning to help improve their texture.
Once everything is prepared, you’ll fill your jars and process them in a boiling-water canner according to the recipe instructions.
One of my favorite things about bread and butter pickles is that they make a fantastic homemade gift. A pretty jar of these sweet pickles is something friends and family can enjoy all year!
Beginner canning tip: Don’t reduce the vinegar or change the proportions of cucumbers and onions in your tested recipe. While you may be tempted to adjust the sweetness, always follow the recipe’s guidance for safe ingredient substitutions.
10. Pickled Beets

If you’re growing beets in your garden, pickling them is a fantastic way to preserve your harvest while creating a delicious side dish you can enjoy throughout the year.
Pickled beets have a wonderful balance of earthy sweetness and tangy vinegar flavor. Plus, their beautiful deep red color makes them a lovely addition to your homemade pantry!
Most traditional pickled beet recipes use fresh beets, vinegar, sugar, water, and spices such as cinnamon, cloves, or allspice.
The preparation takes a little more time than some of the other recipes on this list, but it’s still very manageable for beginners.
You’ll typically start by washing and cooking the beets until they’re tender enough to peel. Once they’ve cooled enough to handle, you can remove the skins and slice or cut the beets according to your tested recipe.
Next, you’ll prepare the pickling liquid, combine it with the beets as directed, and pack everything into prepared canning jars.
After adjusting the headspace and securing the lids, you’ll process the jars in a boiling-water canner for the recommended time.
I especially love pickled beets served alongside a fresh garden salad. They’re also delicious in grain bowls or enjoyed as a simple side dish.
Beginner canning tip: Plain beets and pickled beets require different canning methods. Plain beets are low-acid and must be pressure canned, while properly acidified pickled beets can be safely processed in a boiling-water canner using a tested recipe.
11. Homemade Applesauce
If you’ve ever wanted to try canning but weren’t sure where to start, homemade applesauce is one of the easiest and most rewarding recipes for beginners!
Not only is applesauce incredibly simple to make, but it’s also a wonderful way to preserve fresh apples when they’re in season. If you have an apple tree or love visiting local orchards in the fall, this recipe is a fantastic way to make the most of your harvest.
One of the things I love about homemade applesauce is that you can control what goes into it. Depending on the tested recipe, you may be able to make it without added sugar or include a little cinnamon for extra flavor.
The process starts with washing, peeling, coring, and slicing your apples. Next, you’ll cook them with a small amount of liquid until they’re soft enough to mash or puree.
Once your applesauce reaches your preferred consistency, you’ll reheat it as directed, fill your prepared canning jars, and process them in a boiling-water canner for the recommended time.
Homemade applesauce is delicious on its own, but you can also use it in baking, stir it into oatmeal, or serve it alongside your favorite meals.
Beginner canning tip: Use a tested applesauce recipe and follow its directions for hot packing. Applesauce can trap air, so be sure to remove air bubbles and maintain the recommended headspace before processing.
12. Canned Peaches
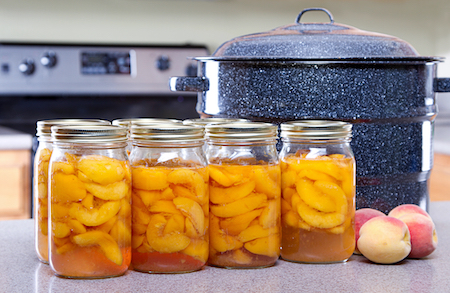
There’s something special about opening a jar of homemade peaches in the middle of winter and enjoying a little taste of summer!
Canning peaches is a fantastic way to preserve fresh, juicy fruit when it’s at its peak. It’s also one of my favorite recipes to recommend to beginners because the ingredients are simple and the finished product is incredibly versatile.
Unlike peach jam, which requires cooking the fruit into a thick spread, canned peaches retain their shape. You can preserve them as halves or slices, making them perfect for snacking, baking, or adding to desserts.
Most tested recipes allow you to can yellow-fleshed peaches in water, fruit juice, or syrup. That means you can choose an option that works best for your family’s preferences.
You’ll start by washing, peeling, and pitting your peaches. Then, you’ll prepare the fruit and packing liquid according to your recipe before filling your jars.
I recommend using the hot-pack method, which generally produces better-quality canned peaches and helps prevent the fruit from floating.
Once your jars are filled, you’ll process them in a boiling-water canner for the time specified in your tested recipe.
Beginner canning tip: Choose ripe but firm yellow-fleshed peaches. White-fleshed peaches may not be acidic enough for standard water bath canning instructions, so don’t substitute them unless you have a tested recipe specifically developed for that variety.
13. Canned Pears
If you love the sweet, delicate flavor of fresh pears, learning how to can them is a wonderful way to enjoy this delicious fruit throughout the year!
Canned pears are another excellent choice for beginner canners because they don’t require a long list of ingredients or complicated preparation techniques.
They’re also incredibly versatile. You can enjoy them straight from the jar, add them to oatmeal, serve them over yogurt, or use them in homemade desserts.
Most tested pear canning recipes call for fresh pears and a packing liquid such as water, fruit juice, or syrup. You may also need an ascorbic acid solution to help prevent the peeled fruit from turning brown.
To get started, you’ll wash, peel, core, and cut your pears into halves or slices. Next, you’ll prepare them according to your recipe and pack them into jars with the recommended liquid.
Like peaches, pears generally turn out better when you use the hot-pack method rather than packing them raw.
After filling your jars and adjusting the headspace, you’ll process them in a boiling-water canner for the recommended amount of time.
I especially love the idea of preserving pears during their peak season so you can enjoy their natural sweetness long after fresh pears are no longer readily available.
Beginner canning tip: Choose ripe but firm pears rather than overly soft fruit. Also, stick with common European pear varieties recommended for canning. Asian pears have different acidity requirements and need special tested instructions for safe preservation.
14. Grape Jelly
If you grew up eating peanut butter and jelly sandwiches, there’s a good chance grape jelly was a staple in your kitchen. But have you ever thought about making your own?
Homemade grape jelly is a delicious and surprisingly approachable canning project that’s perfect for beginners.
One of the reasons I love recommending grape jelly is that you can start with prepared grape juice instead of processing fresh grapes. This saves time and eliminates the need to cook, crush, and strain the fruit yourself.
Most traditional grape jelly recipes use grape juice, sugar, and powdered or liquid pectin. However, the exact ingredients and cooking instructions will depend on the tested recipe you choose.
The basic process involves combining the ingredients in the specified order and bringing the mixture to a boil until it reaches the proper setting point.
Then, you’ll carefully ladle the hot jelly into prepared canning jars, leave the recommended headspace, and process them in a boiling-water canner.
The finished jelly is perfect for sandwiches, toast, biscuits, and even homemade thumbprint cookies.
And if you’re interested in making homemade gifts, a few jars of grape jelly tied with pretty ribbon can be a thoughtful and inexpensive present!
Beginner canning tip: If you’re using store-bought grape juice, make sure it’s suitable for the tested recipe. Avoid making substitutions involving juice blends, added ingredients, or different types of pectin unless the recipe specifically allows them.
15. Cranberry Sauce
If you’re looking for an easy first canning recipe that’s perfect for the holiday season, homemade cranberry sauce is a wonderful choice!
Not only is it delicious, but it’s also a great way to get ahead on holiday meal preparation. Instead of making cranberry sauce at the last minute, you can preserve it ahead of time and have it ready whenever you need it.
One of the things I love about homemade cranberry sauce is how simple the ingredients are. Many traditional recipes use fresh cranberries, sugar, and water, allowing the naturally tart flavor of the berries to shine.
Related: Incredibly Simple Ways to Celebrate an Eco-Friendly Thanksgiving
Depending on the tested recipe, you may be able to make whole-berry cranberry sauce or a smoother, jellied version.
To get started, you’ll wash and sort your cranberries, removing any damaged berries or stems. Next, you’ll combine the ingredients and cook them according to your recipe until the cranberries soften and the sauce reaches the proper consistency.
Once the sauce is ready, you’ll ladle it into prepared canning jars, adjust the headspace, and process them in a boiling-water canner for the recommended time.
Homemade cranberry sauce is delicious alongside holiday meals, but don’t limit yourself to Thanksgiving or Christmas! You can also spread it on toast, serve it with baked brie, or add it to sandwiches.
Beginner canning tip: Choose a scientifically tested recipe specifically designed for canning cranberry sauce. Don’t assume your favorite homemade cranberry sauce recipe is suitable for shelf storage, especially if it contains additional fruits or other ingredients that could affect acidity.
Important Canning Safety Tips Every Beginner Should Know
Canning is a wonderful way to preserve fresh food, reduce waste, and stock your pantry with homemade goodness. However, food safety is one area where you definitely don’t want to take shortcuts!
The good news is that safe home canning doesn’t have to be complicated. By following a few important guidelines, you can feel more confident as you get started.
Always Use Tested Canning Recipes
Not every recipe you find online is safe for home canning. Always choose scientifically tested recipes from trusted sources, such as the National Center for Home Food Preservation, the USDA, or university extension programs.
These recipes have been developed to ensure foods reach the temperatures and processing conditions necessary for safe preservation.
Don’t Change Ingredients or Measurements
While experimenting with ingredients can be fun when you’re cooking, canning requires a little more precision.
Changing the amount of vinegar, lemon juice, vegetables, or other ingredients can affect a recipe’s acidity and safety.
Always follow the ingredient measurements and preparation instructions in your tested recipe. Only make substitutions that the recipe or a trusted canning authority specifically allows.
Use Proper Canning Jars and Lids
Make sure you’re using jars specifically designed for home canning, such as Mason jars.
Before getting started, inspect your jars for cracks, chips, or other damage. Use new flat canning lids for each batch and follow the manufacturer’s instructions for preparing them.
You can reuse jars and undamaged screw bands, but standard flat lids shouldn’t be reused for another canning batch.
Adjust Processing Times for Your Altitude
Did you know that your elevation can affect how long you need to process your jars?
Water boils at lower temperatures at higher elevations, which means foods may require additional processing time or adjusted pressure to be safely preserved.
Always check your recipe’s altitude adjustments before you begin. Even a recipe you’ve made successfully before may need adjustments if you’re canning in a different location.
Never Skip the Processing Step
You might come across older canning methods that involve filling hot jars and letting them seal without processing. However, a sealed lid doesn’t automatically mean the food inside is safe.
For shelf-stable preservation, always process your filled jars using the method and time specified in your tested recipe.
Also, remember that low-acid foods require pressure canning. Simply boiling them longer in a water bath canner won’t make them safe.
Check Your Jar Seals Before Storing
After processing, allow your jars to cool undisturbed for 12 to 24 hours.
Once they’re cool, remove the screw bands and check that each lid has sealed properly. If a jar didn’t seal, refrigerate it promptly or follow tested instructions for safe reprocessing.
Store properly sealed jars in a cool, dark, dry location. Label each jar with the contents and date so you can easily keep track of what you’ve preserved.
Know When to Throw Food Away
Even when you follow proper canning procedures, it’s important to inspect your jars before opening them.
Never eat canned food from a jar with a bulging or loose lid, leaking contents, mold, unusual discoloration, or liquid that spurts out when opened.
Keep in mind that the bacteria responsible for botulism can produce a toxin without any noticeable changes in appearance, smell, or taste.
When in doubt, throw it out! Never taste questionable canned food to determine whether it’s safe.
Start Your Canning Journey One Jar at a Time
Learning how to can is one of those homesteading skills that might seem intimidating at first, but once you get started, you’ll wonder why you didn’t try it sooner!
Whether you’re preserving fresh strawberries from your garden, turning an abundance of cucumbers into crunchy pickles, or making homemade applesauce for your family, these easy first canning recipes are a wonderful way to build your confidence in the kitchen.
Plus, there’s something so rewarding about opening your pantry and seeing rows of homemade preserves that you made yourself. Not only are you reducing food waste and making the most of seasonal produce, but you’re also taking another step toward a more sustainable and self-sufficient lifestyle.
My biggest piece of advice is to start small, follow a tested recipe, and don’t worry about getting everything perfect on your first try. Every experienced home canner started with that very first jar!
Before long, you might find yourself looking forward to canning season and dreaming up all the delicious things you want to preserve next.


